the simplest guide to onDrag and onDrop in SwiftUI
27 june 2023 · reading time: 4 min · category: technicality
this post was done using xcode 14.3, in swift 5. jump to completed code!
when i first tried implementing drag and drop into my project, all i could find was lots of long, extensive tutorials — which is super helpful for learning about the uses of the features, but i had to carefully strip what i needed down, and i struggled a lot with figuring out what did what. so here is the fastest, simplest guide to implementing onDrag and onDrop in SwiftUI.
before we begin: a quick overview of onDrag and onDrop. these features tie into the greater ecosystem of dragging and dropping data between all kinds of apps. the data sent has to conform to a uniform type identifier, which basically enforce the kind of data that your view can send or receive.
for example, a view that receives public.text (often used to transfer plain strings) can receive it from anywhere, much like copy-pasting! keep this in mind when creating your app: a small prototype might not need to take this into consideration, but handling unwanted input is something essential in the long run.
alright, let's dive in to a small, quick, speedy sample.
the important bit
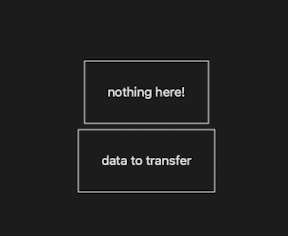
we begin with a quick new project — boilerplate SwiftUI code for a blank view. let's also create two Text() views with lots of padding and an overlay rectangle, so we can see where they are — these will be our drag and drop locations!
import SwiftUI


struct ContentView: View {

  var body: some View {

    // drop box

    Text("nothing here!")

      .padding(30)

      .overlay(

        Rectangle()

        .stroke(.white)

        )


    // drag box

    Text("data to transfer")

      .padding(30)

      .overlay(

        Rectangle()

        .stroke(.white)

        )

  }

}
we need some way to keep track of the data that's being displayed. it's easy to create a State variable for that, which will refresh the view every time it's changed. we'll just quickly change two lines.
struct ContentView: View {

  @State var textToDisplay = "nothing here!"

  var body: some View {

    // drop box

    Text(textToDisplay)

      .padding(30)
and now for the meat of it. let's start with the drag first — that's the easiest.
-
we need to add an onDrag modifier to the view so that swift knows that this view is draggable
-
we need to specify what kind of data should be transferred in the drag
-
optionally, we can also provide a custom preview to the dragged view, which will show up and follow the cursor when it's dragged.
we'll just get our drag box to send a string, "some text!", to the other one. to do this, the NSItemProvider comes in handy as a class to quickly create an NSItem, which is what you need to send data through drag and drop.
// drag box

Text("some text!")

  .padding(30)

  ...

  .onDrag {

    NSItemProvider(object: String("some text!") as NSString)

  }
now try dragging it!
you'll find that it seems to only work occasionally. look closer, and it actually only drags when your cursor is clicking on the text and not anywhere else in the box — this is way too precise for our needs. luckily, there's an easy fix: we simply need to add a contentShape modifier in order to click anywhere to drag it.
Text(textToDisplay)

  .padding(30)

  .contentShape(Rectangle())


Text("some text!")

   .padding(30)

   .contentShape(Rectangle())

   .onDrag { ... }
awesome. all we have to do now is to implement dropping — this comes in a few steps, too.
-
add an onDrop modifier to the view, and specify what content can be received — in this case, we only want
public.text -
make sure that we have at least one item in the dropped stuffs and pick it out
-
load the item's content as a
public.text -
make sure that the content can be interpreted as binary data
-
decode the data to get our string!
-
tell swift that the drop operation completed successfully
and here it is, in code.
// 1. onDrop modifier

.onDrop(of: ["public.text"], isTargeted: nil, perform: { itemProvider, _ in

  // 2. make sure we have at least one item

  if let item = itemProvider.first {

    // 3. load item as public.text

    item.loadItem(forTypeIdentifier: "public.text", options: nil) { (data, err) in


      // 4. make sure that it can be interpreted as binary data

      if let text = data as? Data{


        // 5. decode string and assign it to display

        textToDisplay = String(decoding: text, as: UTF8.self)


        }

      }

    }

    // 6. drop operation completed successfully!

    return true

  })
and there we go! simplest possible implementation of onDrag and onDrop. if you're interested in more detailed usages, here are some more advanced tutorials on kodeco.com and swiftui-lab.com. happy dragging :)
completed code
import SwiftUI


struct ContentView: View {

  @State var textToDisplay = "nothing here!"


  var body: some View {

    Text(textToDisplay)

      .padding(30)

      .contentShape(Rectangle())

      .overlay(Rectangle().stroke(.white))

      .onDrop(of: ["public.text"], isTargeted: nil, perform: { itemProvider, _ in

        if let item = itemProvider.first {

          item.loadItem(forTypeIdentifier: "public.text", options: nil) { (data, err) in

            if let text = data as? Data{

              textToDisplay = String(decoding: text, as: UTF8.self)

            }

          }

        }

        return true

      })


    Text("data to transfer")

      .padding(30)

      .contentShape(Rectangle())

      .overlay(Rectangle().stroke(.white))

      .onDrag { NSItemProvider(object: String("some text!") as NSString) }

  }

}